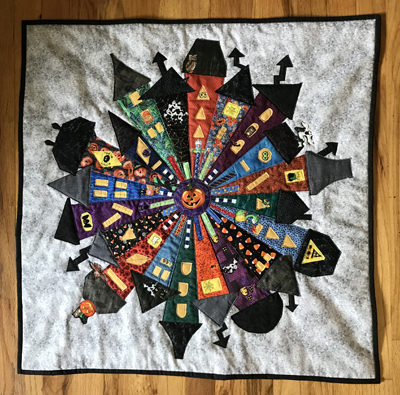
Dresden Neighborhood
Wall Hanging
Assembly by Dawn Lesley Stewart
What you need:
Pattern by Persimon Dreams (designer Kim Lapacek)
Background fabric
Scraps for the houses, windows, doors, roofs, center circle, etc.
Backing and binding fabric
Fusible web
Batting
Dresden Plate ruler
Rotary cutter and/or scissors
Teflon ironing sheet (optional)
Since this is not my pattern, I cannot provide exact cutting instructions. Here are some tips and tricks I used for this project.
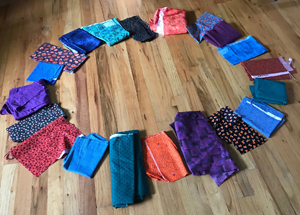
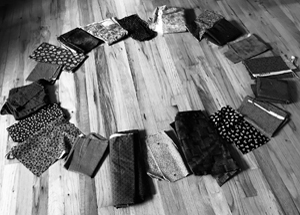
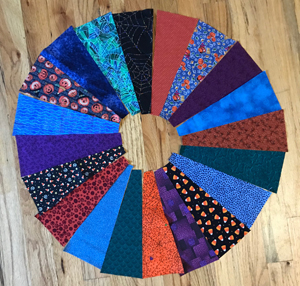
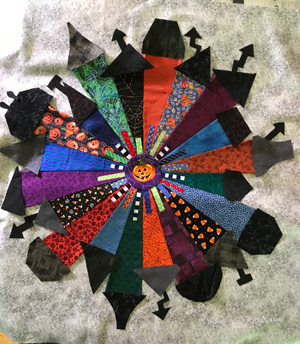
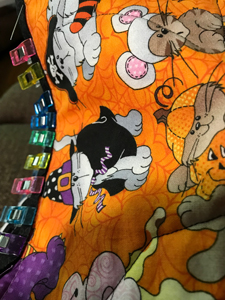
Auditioning Fabrics
This wall hanging uses Dresden Plate wedges for the houses. Smaller scale prints and patterns work best. I like to lay out the fabrics to see how the colors play together. I also check the fabric contrasts and try to make sure no two similar colors or fabric patterns are next to each other. It's helpful to take both a color and black-and-white photo to more easily view the light and dark distribution. Also lay the fabrics against the background fabric. There needs to be contrast between the background and the Dresden wedges so that the house shapes stand out. (An optional background choice is to piece together a unique background rather than using a solid piece of fabric.)
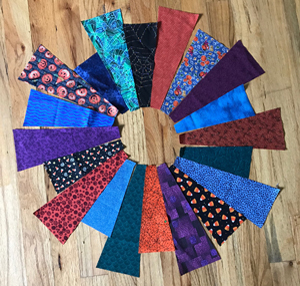
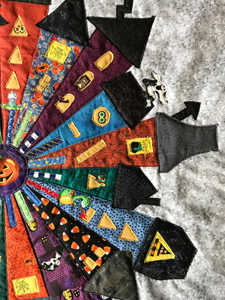
Fabric Prep
Iron fabric and cut out the Dresden Plate shapes. The Dresden wedges are different heights to resemble various style houses. When trimming the houses to size, trim from the wider area at the top of the blade. I do not starch the fabric.
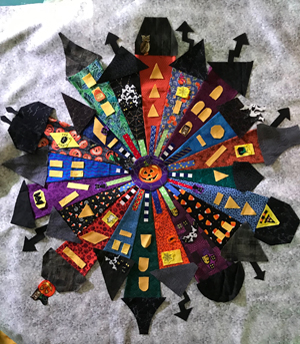
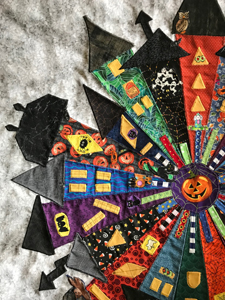
Applique
Use the fusible web on the pieces to be appliqued. Follow the fusible web package instructions. I've used Pellon Wonder-Under and Stitch Witchery. Both adhere well, but the Wonder-Under more easily covers the entire back of the fabric to be fused. This helps prevent fabric fraying. I also prefer to use a Teflon pressing sheet to keep the fusible off the ironing board and iron. If you are looking for extra applique shape inspiration, try coloring books for children, which are filled with simple shapes that can be adapted to fabric (such as roof and chimney styles). This is also a good opportunity to personalize your quilt by adding fun fabric additions such as fussy cut animals, figures, other "neighborhood" items. If making a holiday themed quilt, include images related to the theme. I enjoyed fussy cutting all types of Halloween related images for my quilt (such as bats, owls, ghosts, spider webs ... and even a dragon). I also fussy cut the circle that goes in the center of the quilt to cover the raw edges of the wedge shapes. I find it best to work on a table next to my ironing station. That way I'm less likely to fumble the loose applique pieces between the work space and iron.
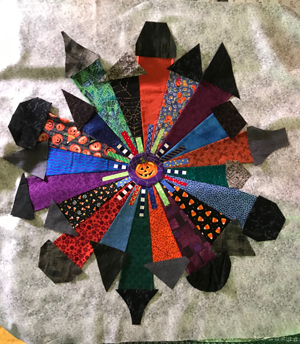 
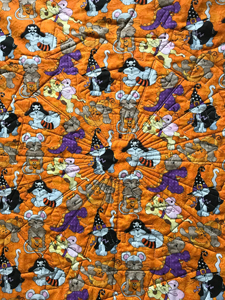
Sewing, Layering and Quilting
Sew the Dresden wedges together to form a circle, iron, and then center the Dresden Plate circle on the background fabric. Position the applique pieces (don't iron them until you are happy with the overall design). Take a photo of the applique layout to make sure you like the placement. Sometimes a photo makes it easier to view the completed design. A photo is also a good reminder of where things are placed in case something moves. Finalize the design and iron the applique to the quilt top. Once all the applique is adhered to the quilt top, select the backing and batting. I use Warm and Natural 100-percent cotton batting. Baste the quilt layers together. Then sew along the Dresden wedges and around each applique shape. Depending on the effect you are after, a straight stitch, zigzag or decorative stitch can be used. If you are not sure how the stitches will look, try the stitches on sample pieces of fabric first.
Finishing the Quilt
Once the quilt is quilted, trim any long thread tails from the back of the quilt. (I usually find a few I missed, so a second look is good.) Bind the quilt. I cut my binding at 2 1/4 inches wide, fold it in half, iron it, and stitch the binding to the quilt top...flipping the binding to the quilt back where I hand sew it in place. If you are unfamiliar with how to bind a quilt, there are many YouTube tutorials explaining the different binding methods. Don't forget to add a label to the quilt back with your name and the date.
I hope you have fun with this quilting project. I did!
Dawn Lesley Stewart enjoys sharing her love of quilting. Her fabric stash is overflowing, and she owns seven sewing machines. Dawn is the author of Harriet’s Horrible Hair Day (picture book), Mist-Seer (paranormal novel), and a series of quilting books, including 300-Plus Quilting Tips, Tricks & Techniques that features over 35 years of quilting knowledge.
Copyright 2025 Dawn Lesley Stewart
|